新建
Diffraction: Kinematical diffraction simulation in py4DSTEM with error check

Linfeng Zhang

推荐镜像 :py4dstem:py4dstem
推荐机型 :c2_m4_cpu
赞
目录
Kinematical diffraction simulation in py4DSTEM
Acknowledgements
This tutorial was created by the py4DSTEM instructor team:
- Colin Ophus (clophus@lbl.gov)
- Ben Savitzky (bhsavitzky@lbl.gov)
- Steve Zeltmann (steven.zeltmann@berkeley.edu)
- Stephanie Ribet (sribet@lbl.gov)
- Alex Rakowski (arakowski@lbl.gov)
pymatgen
We use the python package pymatgen for various symmetry calculations of crystals in py4DSTEM. The ACOM module of py4DSTEM can be used without pymatgen, but with substantially reduced functionality. We therefore recommend installing pymatgen if you wish to perform ACOM calculations.
代码
文本
[17]
import py4DSTEM
import numpy as np
import matplotlib.pyplot as plt
py4DSTEM.__version__
'0.14.2'
代码
文本
Defining crystal structures
代码
文本
[2]
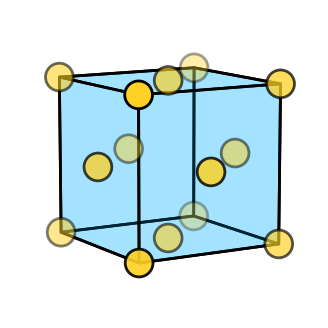
# Define fcc gold structure using manual input of the crystal structure
pos = [
[0.0, 0.0, 0.0],
[0.0, 0.5, 0.5],
[0.5, 0.0, 0.5],
[0.5, 0.5, 0.0],
]
atom_num = 79
a = 4.08
cell = a
crystal = py4DSTEM.process.diffraction.Crystal(
pos,
atom_num,
cell)
代码
文本
[3]
# Plot the structure
crystal.plot_structure(
zone_axis_lattice=[5,3,1],
figsize=(4,4),
)
代码
文本
Other ways to define the crystal structure
代码
文本
[4]
# # # Importing pymatgen - you need to install pymatgen and mp-api if you want to use pymatgen structures or their cif importer.
# from pymatgen.core.structure import Structure, Lattice
代码
文本
[5]
# # Define gold using pymatgen
# a = 4.08
# fcc_Au = Structure(
# Lattice.cubic(a),
# ["Au", "Au", "Au", "Au"],
# [
# [0.0, 0.0, 0.0],
# [0.0, 0.5, 0.5],
# [0.5, 0.0, 0.5],
# [0.5, 0.5, 0.0],
# ])
# crystal = py4DSTEM.process.diffraction.Crystal.from_pymatgen_structure(fcc_Au)
代码
文本
[6]
# # # Plot the structure
# crystal.plot_structure(zone_axis_lattice=[5,3,1])
代码
文本
[7]
# py4DSTEM.process.diffraction.Crystal.from_CIF(file_cif)
代码
文本
[8]
# # Import the gold structure directly from The Material Project
# crystal = py4DSTEM.process.diffraction.Crystal.from_pymatgen_structure(
# "mp-752738",
# MP_key = "",
# )
代码
文本
[9]
# # # Plot the structure
# crystal.plot_structure(zone_axis_lattice=[5,3,1])
代码
文本
Structure factors
代码
文本
[10]
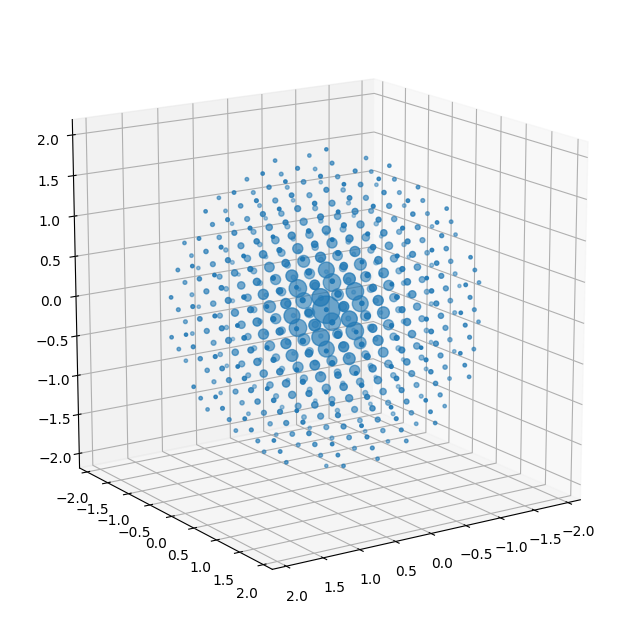
# Calculate and plot the structure factors
k_max = 2.0 # This is the maximum scattering vector included in the following calculations
# k_max = 6.0
crystal.calculate_structure_factors(k_max)
crystal.plot_structure_factors(
zone_axis_lattice=[3,2,1])
代码
文本
Generate and plot diffraction patterns
代码
文本
[11]
# specify the accelerating voltage
crystal.setup_diffraction(300e3)
代码
文本
[12]
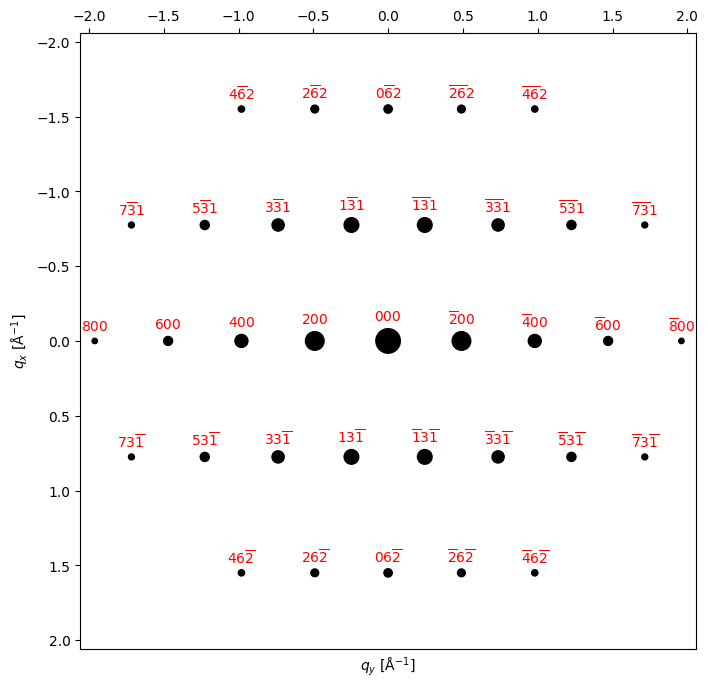
zone_axis_test = [0,1,3] # Zone axis
# zone_axis_test = [0,0,1] # Zone axis
# x_proj_test = [1,0,0] # in-plane projection vector
bragg_peaks = crystal.generate_diffraction_pattern(
zone_axis_lattice = zone_axis_test,
# proj_x_lattice = x_proj_test,
sigma_excitation_error=0.02
)
py4DSTEM.process.diffraction.plot_diffraction_pattern(
bragg_peaks,
# add_labels=False,
figsize=(8,8),
# shift_labels=0.2,
)
代码
文本
Orientation matching
代码
文本
[13]
# Create an orientation plan
crystal.orientation_plan()
# # Create an orientation plan with an automatic range of zone axes - this requires pymatgen to be installed!
# crystal.orientation_plan(
# angle_step_zone_axis = 2.0,
# angle_step_in_plane = 2.0,
# accel_voltage = 300e3,
# corr_kernel_size=0.08,
# zone_axis_range='auto',
# # zone_axis_range=np.array([
# # [0,0,1],
# # [0,1,0],
# # [1,0,0],
# # ]),
# )
Orientation plan: 100%|██████████████████████████████████████████████████████████████████████████████████████████████████████████████| 406/406 [00:00<00:00, 771.54 zone axes/s]
代码
文本
[14]
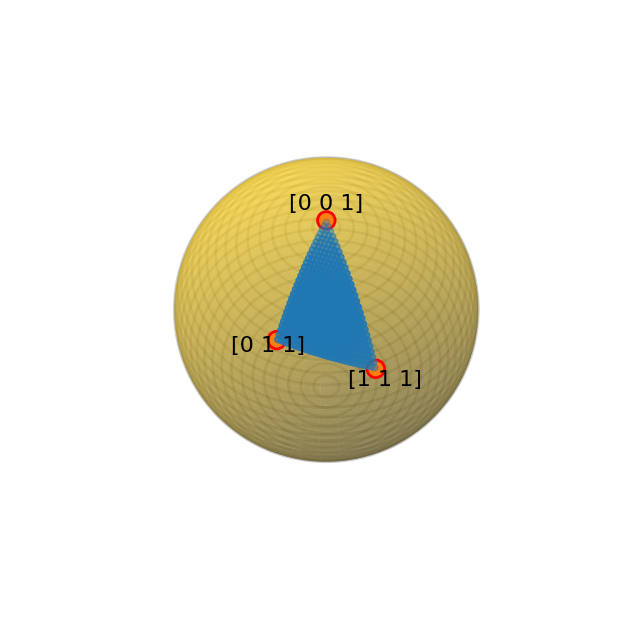
# Plot the zone axes included in the orientation plan
crystal.plot_orientation_zones()
代码
文本
[15]
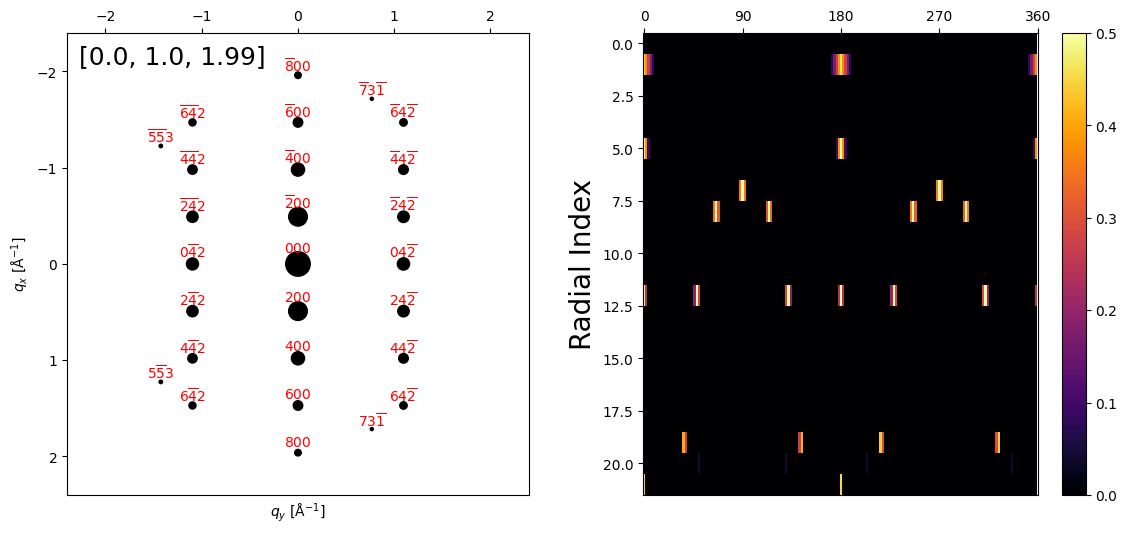
# Plot some of the orientation plans
crystal.plot_orientation_plan(zone_axis_lattice=[0,1,2]);
代码
文本
[16]
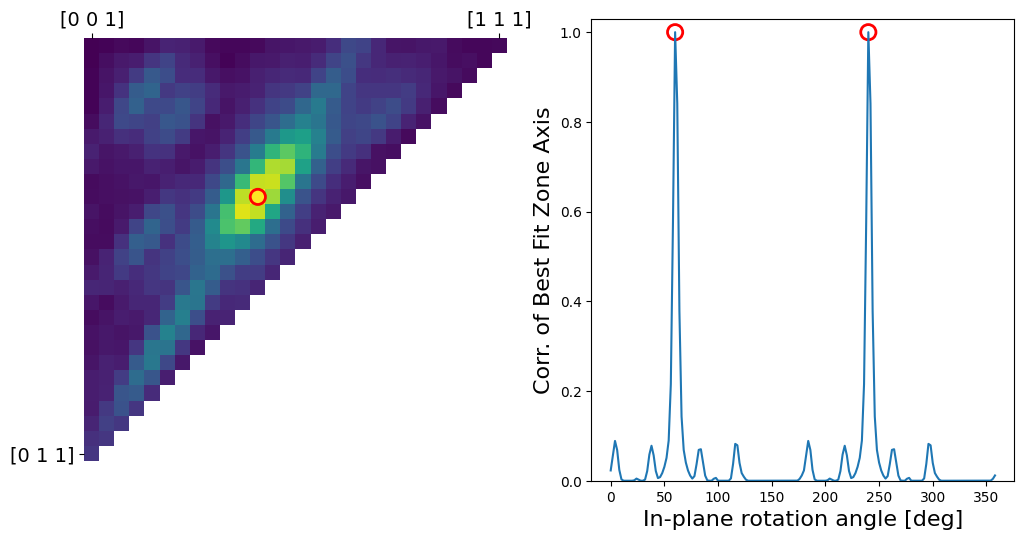
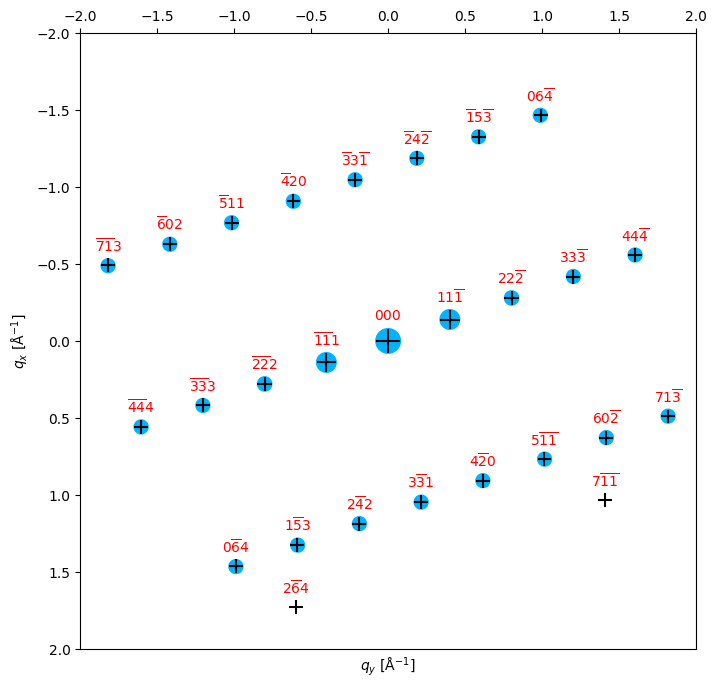
# Testing some matches - this cell shows the orientation correlogram, and the best match for both zone axis and in-plane rotation.
# The input diffraction pattern is shown as blue circles, and the best fit as black crosses.
zone_axis_test = [1,2,3]
# zone_axis_test = [0.25,0.983,0.1345]
# zone_axis_test = [-1,-2,-3]
# zone_axis_test = [0.2,0.4,0.7]
proj_x_test = [-0.24,0.56,0]
bragg_peaks = crystal.generate_diffraction_pattern(
zone_axis_lattice = zone_axis_test,
proj_x_lattice = proj_x_test,
sigma_excitation_error=0.02)
# Print out zone axes after normalization
zone_axis_lattice = crystal.cartesian_to_lattice(zone_axis_test)
print('Input lattice zone axis = ([' +
f'{zone_axis_lattice[0]:.{3}f}' + ' ' +
f'{zone_axis_lattice[1]:.{3}f}' + ' ' +
f'{zone_axis_lattice[2]:.{3}f}' + '])'
)
# Perform matching, and plot correlation images
orientation, fig, ax = crystal.match_single_pattern(
bragg_peaks,
figsize=[12,6],
plot_corr=True,
verbose=True,
returnfig=True,
)
# plot the match overlaid onto the input data
bragg_peaks_fit = crystal.generate_diffraction_pattern(
orientation,
sigma_excitation_error=0.03)
py4DSTEM.process.diffraction.plot_diffraction_pattern(
bragg_peaks_fit,
bragg_peaks_compare=bragg_peaks,
min_marker_size=100,
plot_range_kx_ky=[k_max,k_max],
figsize=(8,8)
)
代码
文本
Testing mean error of orientation plan
These further cells are for testing the mean error for a given orientation plan. It uses the same zone axes as the orientation plan.
代码
文本
[18]
def vector_angle(a: np.ndarray, b: np.ndarray) -> float:
theta = np.arccos(np.clip((a @ b) / (np.linalg.norm(a) * np.linalg.norm(b)), -1.0, 1.0))
if theta > np.pi/2:
theta = np.pi - theta
return theta
代码
文本
[19]
# Fit all orientations included in the plan
orientations_test = crystal.orientation_rotation_matrices
test_patterns = py4DSTEM.PointListArray(bragg_peaks.data.dtype,(orientations_test.shape[0],1))
for a0 in range(orientations_test.shape[0]):
p = crystal.generate_diffraction_pattern(orientation_matrix=orientations_test[a0])
test_patterns.get_pointlist(a0,0).add(p.data)
test_patterns_vectors = py4DSTEM.BraggVectors(
Rshape=test_patterns.shape,
Qshape=(10,10),
)
test_patterns_vectors.set_raw_vectors(test_patterns)
test_patterns_vectors.calibration.set_origin((0,0))
test_patterns_vectors.calibration.set_ellipse((1,1,1))
test_patterns_vectors.calibration.set_QR_flip('False')
test_patterns_vectors.calibration.set_QR_rotation_degrees(0)
test_patterns_vectors.setcal()
orientation_map = crystal.match_orientations(test_patterns_vectors)
Matching Orientations: 100%|██████████████████████████████████████████████████████████████████████████████████████████████████████████| 406/406 [00:31<00:00, 12.73 PointList/s]
代码
文本
[20]
# Generate a custom error plot
errors = np.zeros((orientations_test.shape[0],))
for a0 in range(orientations_test.shape[0]):
errors[a0] = vector_angle(
orientations_test[a0,:,2],
orientation_map.matrix[a0,0,0,:,2])
print('Mean angle error = ' + str(np.round(np.mean(errors)*180/np.pi, decimals=3)) + ' degrees')
error_img = np.ma.masked_array(np.zeros((crystal.orientation_zone_axis_steps+1, crystal.orientation_zone_axis_steps+1)),mask=True)
diff_intensity_img = np.ma.masked_array(np.zeros((crystal.orientation_zone_axis_steps+1, crystal.orientation_zone_axis_steps+1)),mask=True)
n_spots_img = np.ma.masked_array(np.zeros((crystal.orientation_zone_axis_steps+1, crystal.orientation_zone_axis_steps+1)),mask=True)
for a0 in np.arange(crystal.orientation_zone_axis_steps+1):
inds = np.arange(a0*(a0+1)/2, a0*(a0+1)/2 + a0 + 1)
inds_val = np.round(inds).astype('int')
v = np.arange(a0+1)
x_inds = a0 - v
y_inds = v
inds1D = np.ravel_multi_index([x_inds,y_inds], error_img.shape)
error_img.ravel()[inds1D] = errors[inds_val]
error_img.ravel()[inds1D].mask = False
diff_intensity_img[a0,range(a0+1)] = np.array([test_patterns.get_pointlist(i,0).data['intensity'].sum() for i in inds_val])
diff_intensity_img[a0,range(a0+1)].mask = False
n_spots_img[a0,range(a0+1)] = np.array([test_patterns.get_pointlist(i,0).data['intensity'].shape[0] for i in inds_val])
n_spots_img[a0,range(a0+1)].mask = False
Mean angle error = 0.008 degrees
代码
文本
[21]
fig,ax = plt.subplots(figsize=(10,10))
cm = plt.get_cmap("inferno").copy()
cm.set_bad('w')
im = ax.imshow(np.rad2deg(error_img),cmap=cm,vmin=0,vmax=5)
label_0 = crystal.orientation_zone_axis_range[0,:]
label_0 = np.round(label_0 * 1e3) * 1e-3
label_0 /= np.min(np.abs(label_0[np.abs(label_0)>0]))
label_1 = crystal.orientation_zone_axis_range[1,:]
label_1 = np.round(label_1 * 1e3) * 1e-3
label_1 /= np.min(np.abs(label_1[np.abs(label_1)>0]))
label_2 = crystal.orientation_zone_axis_range[2,:]
label_2 = np.round(label_2 * 1e3) * 1e-3
label_2 /= np.min(np.abs(label_2[np.abs(label_2)>0]))
ax.set_yticks([crystal.orientation_zone_axis_steps])
ax.set_yticklabels([
str(label_1)])
ax.set_xticks([0, crystal.orientation_zone_axis_steps])
ax.set_xticklabels([
str(label_0),
str(label_2)])
ax.xaxis.tick_top()
ax.set_title("Orientiation Error (°)")
fig.colorbar(im)
plt.show()

代码
文本
Hexagonal and rational indexing
代码
文本
[22]
# Define titanium structure using manual input of the crystal structure
pos = np.array([
[1/3, 2/3, 0.25],
[2/3, 1/3, 0.75],
])
atom_num = 22
a = 2.95
c = 4.69
alpha = 90.0
gamma = 120.0
cell = [a,a,c,alpha,alpha,gamma]
crystal = py4DSTEM.process.diffraction.Crystal(
pos,
atom_num,
cell)
代码
文本
[23]
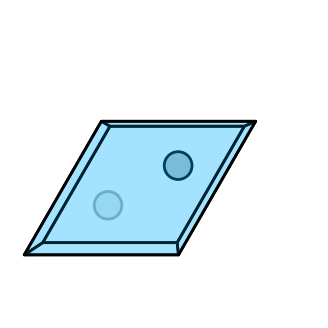
# Plot the structure
crystal.plot_structure(
# zone_axis_lattice=[0,0,1],
camera_dist=7,
figsize=(4,4),
)
代码
文本
Hexagonal indexing
The py4DSTEM ACOM module now supports hexagonal indexing, which we will demonstrate here.
代码
文本
[24]
crystal.rational_ind( crystal.lattice_to_hexagonal([1,4,3]))
array([-2, 7, -5, 9])
代码
文本
[25]
print(crystal.rational_ind(crystal.lattice_to_hexagonal([1,0,0])),
crystal.rational_ind(crystal.lattice_to_hexagonal([0,1,0])),
crystal.rational_ind(crystal.lattice_to_hexagonal([-1,-1,0])))
[ 2 -1 -1 0] [-1 2 -1 0] [-1 -1 2 0]
代码
文本
[26]
print(crystal.rational_ind(crystal.lattice_to_hexagonal([1,2,0])),
crystal.rational_ind(crystal.lattice_to_hexagonal([2,1,0])),
crystal.rational_ind(crystal.lattice_to_hexagonal([-1,1,0])))
[ 0 1 -1 0] [ 1 0 -1 0] [-1 1 0 0]
代码
文本
[27]
crystal.rational_ind( crystal.hexagonal_to_lattice([2,0,-2,2]))
array([2, 1, 1])
代码
文本
[28]
print(crystal.rational_ind(crystal.hexagonal_to_lattice([2,-1,-1,0])),
crystal.rational_ind(crystal.hexagonal_to_lattice([-1,2,-1,0])),
crystal.rational_ind(crystal.hexagonal_to_lattice([-1,-1,2,0])))
[1 0 0] [0 1 0] [-1 -1 0]
代码
文本
[29]
print(crystal.rational_ind(crystal.hexagonal_to_lattice([0,1,-1,0])),
crystal.rational_ind(crystal.hexagonal_to_lattice([1,0,-1,0])),
crystal.rational_ind(crystal.hexagonal_to_lattice([-1,1,0,0])))
[1 2 0] [2 1 0] [-1 1 0]
代码
文本
[30]
# For arbitrary directions, the output crystallographic vectors may have large integer values:
print(crystal.rational_ind(
crystal.lattice_to_hexagonal([-0.22,0.79,0.13]),10),
)
[-6 9 -3 2]
代码
文本
[31]
crystal.rational_ind([0.12391233,-0.2347335,0.774512],30)
array([ 520, -986, 3253])
代码
文本
[32]
k_max = 2.5
crystal.calculate_structure_factors(k_max)
crystal.plot_structure_factors(
# zone_axis_lattice=[1,0,-1,0],
# zone_axis_lattice=[1,-1,0,0],
# zone_axis_lattice=[0,1,-1,0],
zone_axis_lattice=[1,1,-2,0],
# zone_axis_lattice=[1,1,-2,0],
# zone_axis_lattice=[1,1,-2,0],
# plot_limit=1.2,
)

代码
文本
[33]
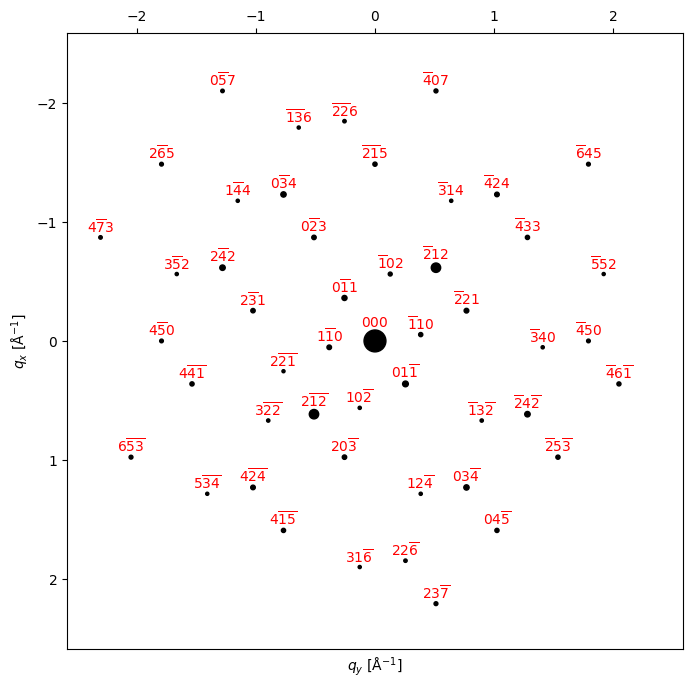
# Try plotting some diffraction patterns
zone_axis_hex = [2,1,-1,3] # Zone axis
bragg_peaks = crystal.generate_diffraction_pattern(
zone_axis_lattice = zone_axis_hex,
sigma_excitation_error=0.02
)
py4DSTEM.process.diffraction.plot_diffraction_pattern(
bragg_peaks,
figsize=(8,8),
)
代码
文本
[ ]
代码
文本
点个赞吧
本文被以下合集收录
py4DSTEM Tutorials

Linfeng Zhang

更新于 2024-07-25
22 篇7 人关注
MD

bohr61096f

更新于 2024-08-27
47 篇0 人关注
推荐阅读
公开
Diffraction: kinematical diffraction simulation in py4DSTEM
Linfeng Zhang

发布于 2023-09-18
公开
Diffraction: simulating Dynamical Diffraction with py4DSTEM.process.diffraction
Linfeng Zhang

发布于 2023-09-18
1 赞

